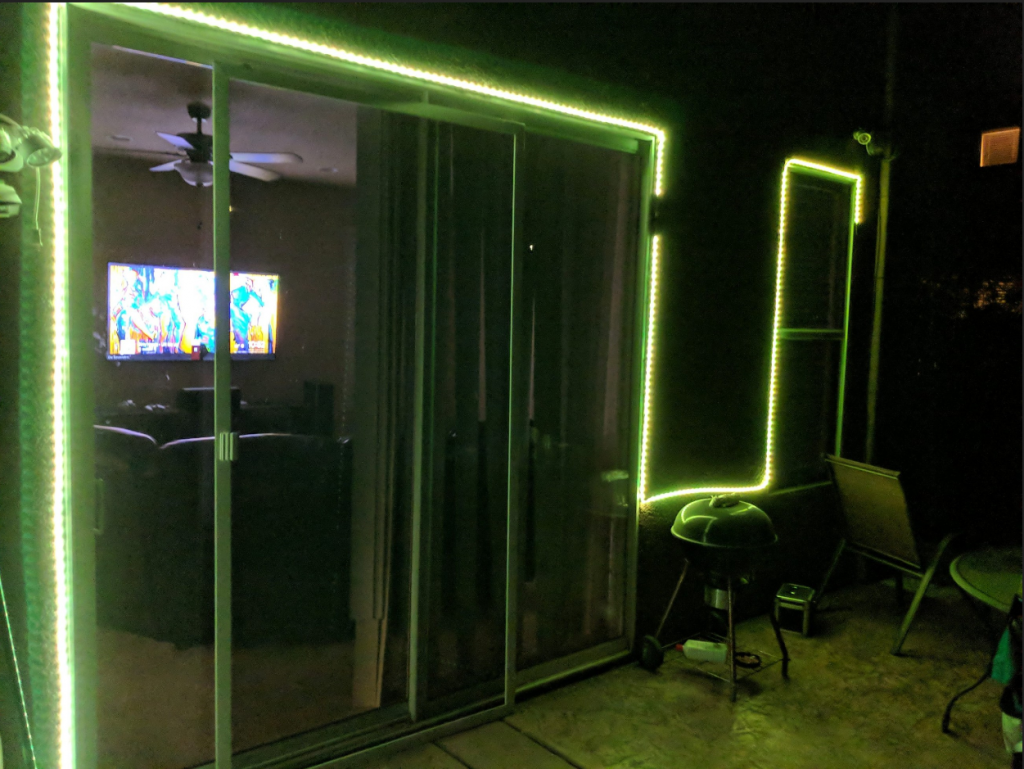
I’m a massive fan of using Home Assistant for running all aspects of my “smart home” automation routines. This weekend I decided to put up some spare RGB light strips around my patio. In the span of about 1 hour, I’ve got a LED Strip solution that is entirely controlled by open source software, run locally by me (no cloud required), and is very customizable. I’m using the following parts —
These little generic LED Strip controllers are great because they are essentially small ESP8266 devices put into a easy to work with enclosure for you – no assembly required. You can also flash them with ESPHome if you want, but it’s not necessary. Out of the box Home Assistant will discover them with a few lines of code in the configuration file to enable the component –
# Example configuration.yaml entry
  - platform: flux_led
    automatic_add: true
    devices:
      192.168.50.101:
        name: office_led
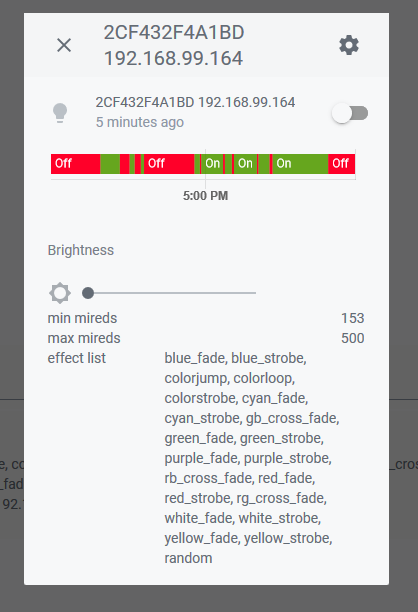
After you’ve discovered them – they show up like any other light –
Now that we have a light, we can trigger it however we want or add it to automations. I have cameras setup outside that I monitor with Zoneminder, and I have the Zoneminder component in HA setup. That means I can create an automation that does the following very easily —
- Waits for the ‘state‘ of my ‘camera.backyard‘ entity to go from ‘idle’ to ‘recording’ (IE – When motion is detected)
- If it’s dark outside (Sun below Horizon) – Flip on my RGB LED Strip
- After ten minutes of no activity (Camera is in ‘idle‘ state) – Turn off the RGB LED Strip.
Here’s the complete code below –
UPDATE – Turns out the above is pretty slow (30 seconds for Home Assistant to see the state change)
If you’d like to use a better solution to this problem, Try my script below and run it on your ZoneMinder Server. It uses the Python3 Py-ZM API Wrapper module to query the memory of the the server directly, and uses a webhook to call the HA automation instead. Using this method has cut down the execution time to 2-3 seconds.
Bonus! Here’s a script that will make sure the above script is always running. Schedule this to run with cron, and it will make sure the notification script above is always ‘watching’!